Let’s say we want to build an app or feature that imports a photo and then classifies what the image is. For example, if we import an image of a dog, the app should recognize that it is a dog.
How can we do that within iOS?
First, let’s break down the feature. We need the following two components:
- An Image Classification service
- An image picker that imports a photo (presumably from Photos)
Let’s start with the first one, building the classification service.
To perform Machine Learning algorithms, we need to provide a trained model. An ML Model is basically a piece of software that is specifically trained in one thing. Usually recognizing a pattern. In order for our app to detect if the image is indeed a certain object, we need a thus a Core ML Model that is trained to classify images.
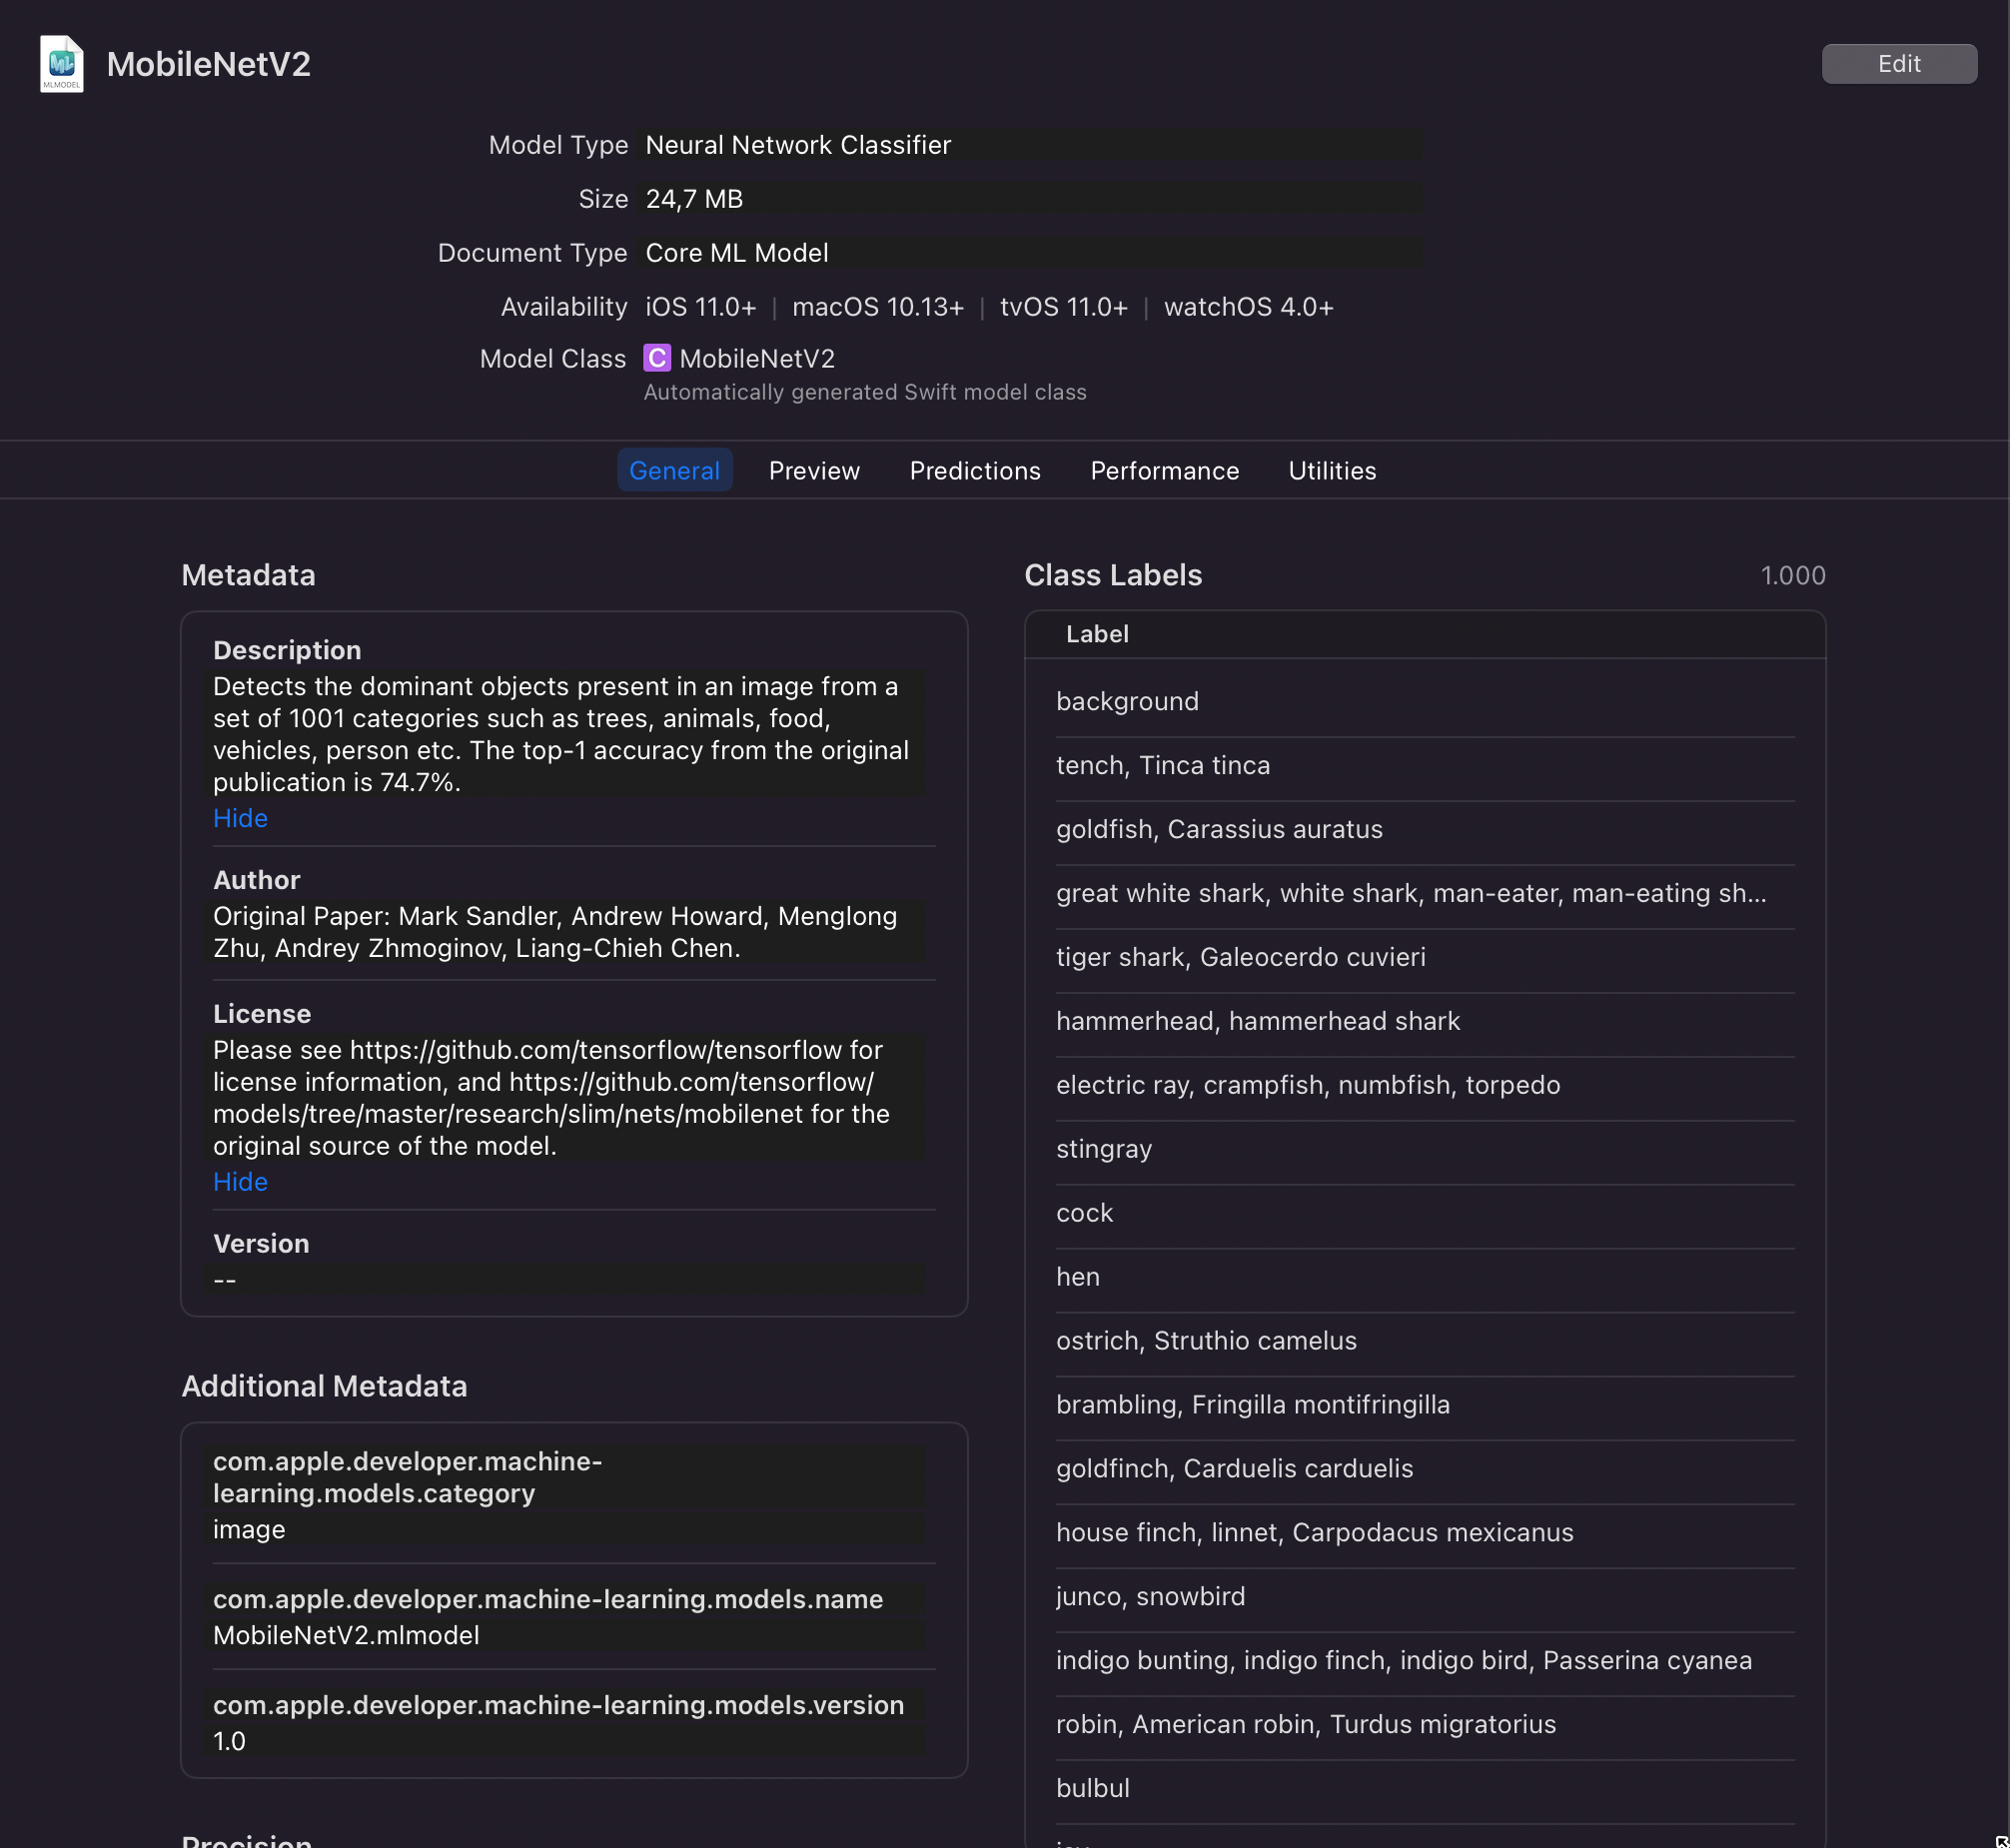
There are several models provided by Apple that we can use here. For this example project, we are using MobileNetV2, but feel free to use different ones.
If you need other Core ML Models, feel free to look around on GitHub or this page.
Then let’s download this Core ML Model, and import it into our project.
Clicking on the ML Model within Xcode also displays relevant information for the trained model.
To make use of this ML, Apple provides an API called Vision. Vision contains algorithms that perform tasks on images and video. To do that we need to define a request that is based on VNCoreMLRequest
Let’s define first what our app needs from a classification service.
protocol ClassificationServiceProviding {
    var classificationsResultPub: Published<String>.Publisher { get }
    func updateClassifications(for image: UIImage)
}
We know that the service needs to provide us with an option to start the classification process of an image, and an option to get the results.
Now let’s implement that service and also the VNCoreMLRequest.
final class ClassificationService: ClassificationServiceProviding {

    @Published private var classifications: String = ""
    var classificationsResultPub: Published<String>.Publisher { $classifications }

    /// - Tag: MLModelSetup
    lazy var classificationRequest: `VNCoreMLRequest` = {
        do {
            let model = try VNCoreMLModel(for: MobileNetV2(configuration: MLModelConfiguration()).model)

            let request = VNCoreMLRequest(model: model, completionHandler: { [weak self] request, error in
                self?.processClassifications(for: request, error: error)
            })
            request.imageCropAndScaleOption = .centerCrop
            return request
        } catch {
            fatalError("Failed to load Vision ML model: \(error)")
        }
    }()


    // MARK: - Image Classification

    /// - Tag: PerformRequests
    func updateClassifications(for image: UIImage) {
        let orientation = CGImagePropertyOrientation(image.imageOrientation)
        guard let ciImage = CIImage(image: image) else { fatalError("Unable to create \(CIImage.self) from \(image).") }

        /// Clear old classifications
        self.classifications = ""

        DispatchQueue.global(qos: .userInitiated).async {
            let handler = VNImageRequestHandler(ciImage: ciImage, orientation: orientation)

            do {
                try handler.perform([self.classificationRequest])
            } catch {
                print("Failed to perform classification.\n\(error.localizedDescription)")
            }
        }
    }

    /// Updates the variable with the results of the classification.
    /// - Tag: ProcessClassifications
    private func processClassifications(for request: VNRequest, error: Error?) {
        DispatchQueue.main.async {
            guard let results = request.results else {
                return
            }
            // The `results` will always be `VNClassificationObservation`s, as specified by the Core ML model in this project.
            let classifications = results as! [VNClassificationObservation]

            if classifications.isEmpty {
                // do nothing
            } else {
                // Display top classifications ranked by confidence in the UI.
                let topClassifications = classifications.prefix(5)
                let descriptions = topClassifications.map { classification in
                    // Formats the classification for display; e.g. "(0.37) cliff, drop, drop-off".
                    return String(format: "(%.2f) %@\n", classification.confidence, classification.identifier)
                }

                self.classifications = descriptions.joined(separator: " ")
            }
        }
    }
}
Let’s break this down.
First, we have defined a variable called classificationRequest that is of type VNCoreMLRequest. Within here we specify that we want to use the ML Model that we’ve imported, and every time a request is processed, send the results to the function processClassifications.
Then we have the function updateClassifications which allows clients/ViewModels/stores to update the classifications of a specific image. Thus if an image is given, it will perform a Vision Image request based on the type VNImageRequestHandler. This takes two params of type CIImage and CGImagePropertyOrientation.
To help us define the orientation of the image, Apple has provided an extension to achieve this.
///
/// https://developer.apple.com/documentation/imageio/cgimagepropertyorientation
///
extension CGImagePropertyOrientation {
    /**
     Converts a `UIImageOrientation` to a corresponding
     `CGImagePropertyOrientation`. The cases for each
     orientation are represented by different raw values.

     - Tag: ConvertOrientation
     */
    init(_ orientation: UIImage.Orientation) {
        switch orientation {
        case .up: self = .up
        case .upMirrored: self = .upMirrored
        case .down: self = .down
        case .downMirrored: self = .downMirrored
        case .left: self = .left
        case .leftMirrored: self = .leftMirrored
        case .right: self = .right
        case .rightMirrored: self = .rightMirrored
        @unknown default:
            fatalError()
        }
    }
}
The Image Request handler then performs the algorithm which is our ML Model that we have defined as classificationRequest.
At last, processClassifications is then called once our classificationRequest is finished, and publishes the results accordingly to be displayed.
Now that we have our service, let’s define our ViewModel to operate the connect the UI and service.
import Combine
import UIKit

@MainActor
final class ContentViewModel: ObservableObject {
    @Published var displayImagePicker: Bool = false

    @Published var importedImage: UIImage? = nil

    @Published var classifications: String = ""

    let service: ClassificationServiceProviding

    private var subscribers: [AnyCancellable] = []

    init(
        image: UIImage? = nil,
        service: ClassificationServiceProviding = ClassificationService()
    ) {
        self.importedImage = image
        self.service = service

        self.subscribe()
        self.onChangeImage()
    }

    func subscribe() {
        self.service.classificationsResultPub
            .receive(on: DispatchQueue.main)
            .sink { [weak self] newClassifications in
                self?.classifications = newClassifications
            }
            .store(in: &subscribers)
    }

    func onChangeImage() {
        guard let image = importedImage else { return }
        service.updateClassifications(for: image)
    }
}
No need to explain much here, we have defined some published variables to display certain UI elements, and our ViewModel is dependent on a class that is compliant with protocol ClassificationServiceProviding.
Once, the UI receives/changes an imported image, we call onChangeImage() to start the classification process.
Now let’s go to our SwiftUI view.
SwiftUI doesn’t have an inherent ImagePicker and thus we have to use an UIKit component called PHPickerViewController.
Without exploring how to do that, there is already a great article by Hacking with Swift already on have to achieve this.
Let’s use that article’s ImagePicker and build the following SwiftUI view.
struct ContentView: View {
    @StateObject var viewModel = ContentViewModel()

    var body: some View {
        NavigationView {
            if let image = viewModel.importedImage {
                VStack(alignment: .leading) {
                    Image(uiImage: image)
                        .resizable()
                        .aspectRatio(contentMode: .fit)
                        .clipShape(RoundedRectangle(cornerRadius: 30, style: .continuous))
                        .padding()
                        .onTapGesture {
                            viewModel.displayImagePicker.toggle()
                        }

                    ScrollView {
                        Text(viewModel.classifications)
                            .bold()
                            .padding()
                    }
                }
            } else {
                VStack {
                    Image(systemName: "photo.fill")
                        .imageScale(.large)
                        .foregroundColor(.accentColor)

                    Button {
                        viewModel.displayImagePicker.toggle()
                    } label: {
                        Text("Pick an image")
                            .bold()
                            .frame(maxWidth: .infinity)
                            .padding()
                            .background(Color.accentColor)
                            .foregroundColor(.white)
                            .cornerRadius(16)
                    }
                }
                .padding()
            }
        }
        .onChange(of: viewModel.importedImage) { _ in viewModel.onChangeImage() }
        .sheet(isPresented: $viewModel.displayImagePicker) {
            ImagePicker(image: $viewModel.importedImage)
        }
    }
}
Let’s run the app and import an image and see what happens.
We see the imported image on the app, and also the classification results as well.
Used image is provided by Unsplash by Matt Drenth
Congratulations! You have now learned how to make use of a Machine Learning model to classify an imported image within an iOS/iPadOS app.
Hope you now have an idea of how to start with getting started with Core ML, Vision, and image classifications. Continue building great stuff!
The full source code example project is available here on GitHub.
Follow me on Twitter