SwiftUI - Weather Hourly Forecast example
Hourly Forecast SwiftUI Component Example


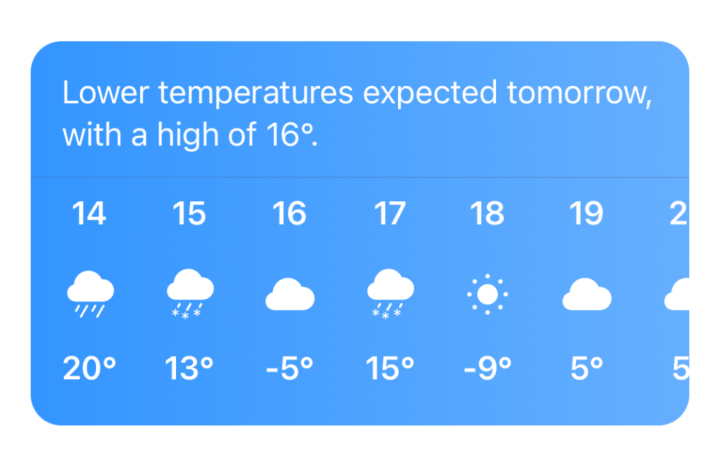
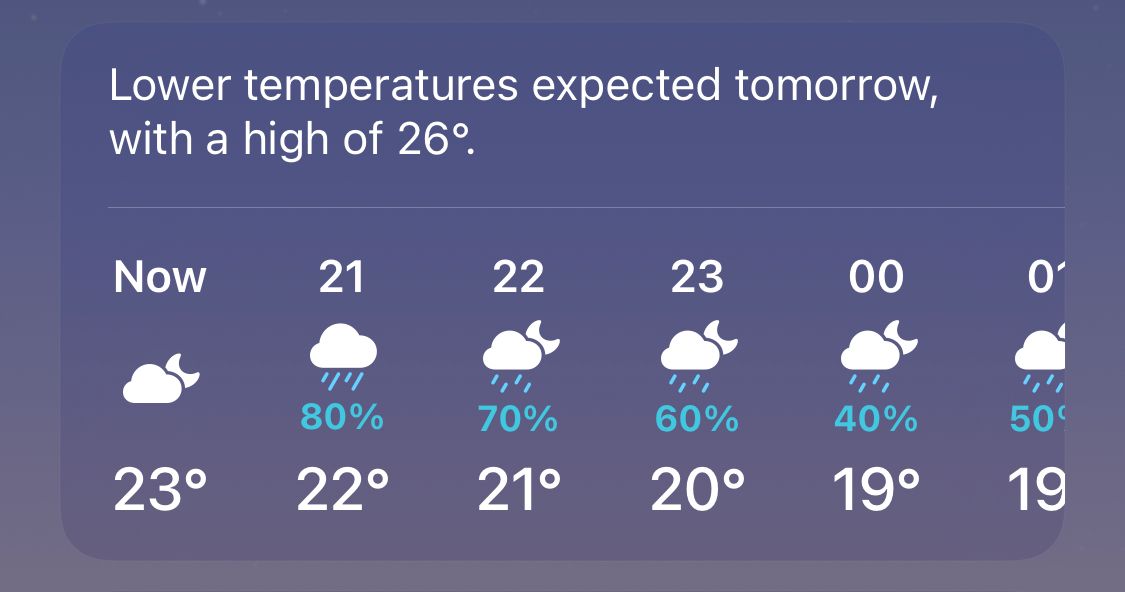
Let’s see how can we build this component of Apple’s weather app in SwiftUI.
First, what do we need to display within the view?
- The headline of the forecast
- Hours
- Rain percentage
- Weather State
Let’s define that in a data model:
struct HourlyForecastModel {
    let headline: String
    let forecasts: [HourForecast]

    static private var staticRandomHeadlines = [
        "Lower temperatures expected tomorrow, with a high of 16°.",
        "Higher temperatures expected today, with a high of 20°",
    ]

    static func makeRandom() -> HourlyForecastModel {
        let randomHourForecasts = (0...24).map { HourForecast.makeRandom(
            hour: Calendar.current.component(
                .hour,
                from: Calendar.current.date(
                    byAdding: .hour,
                    value: $0,
                    to: Date()
                )!
            ))
        }

        return HourlyForecastModel(
            headline: self.staticRandomHeadlines.randomElement()!,
            forecasts: randomHourForecasts
        )
    }
}

struct HourForecast {
    let hour: Int
    let celsius: Int
    let weatherType: WeatherType

    static func makeRandom(hour: Int) -> HourForecast {
        .init(
            hour: hour,
            celsius: Int.random(in: -10...20),
            weatherType: WeatherType.allCases.randomElement()!
        )
    }
}

extension HourForecast: Hashable { }

enum WeatherType {
    case sunny
    case cloud
    case rain
    case snow
    case hail
    case lightning

    var systemNameIcon: String {
        switch self {
        case .sunny:
            return "sun.min.fill"
        case .cloud:
            return "cloud.fill"
        case .rain:
            return "cloud.rain.fill"
        case .snow:
            return "cloud.sleet.fill"
        case .hail:
            return "cloud.hail.fill"
        case .lightning:
            return "cloud.bolt.fill"
        }
    }
}

extension WeatherType: CaseIterable { }
To help us with displaying, we’ve also added a few static random data generators.
Then let’s create a data service provider and a ViewModel to allow a view to display the data to a UI.
protocol ForecastProviding {
    func getHourlyForecastData() -> HourlyForecastModel
}

final class MockForecastProvider: ForecastProviding {
    func getHourlyForecastData() -> HourlyForecastModel {
        return .makeRandom()
    }
}

@MainActor
final class ContentViewModel: ObservableObject {
    @Published var data: HourlyForecastModel

    private let forecastProvider: ForecastProviding

    init(forecastProvider: ForecastProviding = MockForecastProvider()) {
        self.forecastProvider = forecastProvider
        self.data = self.forecastProvider.getHourlyForecastData()
    }
}
Now, our ContentViewModel receives a provider that allows data to be fetched, and then once the data is retrieved, we publish it.
Lastly, let’s create a view similar to the one of the official Apple weather app, which subscribes to the provided data.
struct ContentView: View {
    @StateObject private var viewModel = ContentViewModel()

    var body: some View {
        hourForecastView
    }

    private var hourForecastView: some View {
        VStack(alignment: .leading) {
            Text(viewModel.data.headline)
                .padding(.horizontal)

            Divider()

            ScrollView(.horizontal, showsIndicators: false) {
                LazyHStack(alignment: .top, spacing: 24) {
                    ForEach(viewModel.data.forecasts, id: \.self) { forecast in
                        VStack {
                            Text("\(forecast.hour)")
                                .bold()

                            Image(systemName: forecast.weatherType.systemNameIcon)
                                .imageScale(.large)
                                .frame(height: 40)

                            Text("\(forecast.celsius)°")
                                .bold()
                        }
                    }
                }
                .padding([.horizontal])
            }
        }
        .padding(.vertical)
        .frame(height: 200)
        .foregroundColor(.white)
        .background(
            LinearGradient(gradient: Gradient(colors: [.accentColor.opacity(0.8), .accentColor.opacity(0.6)]), startPoint: .leading, endPoint: .trailing)
        )
        .cornerRadius(16)
    }
}
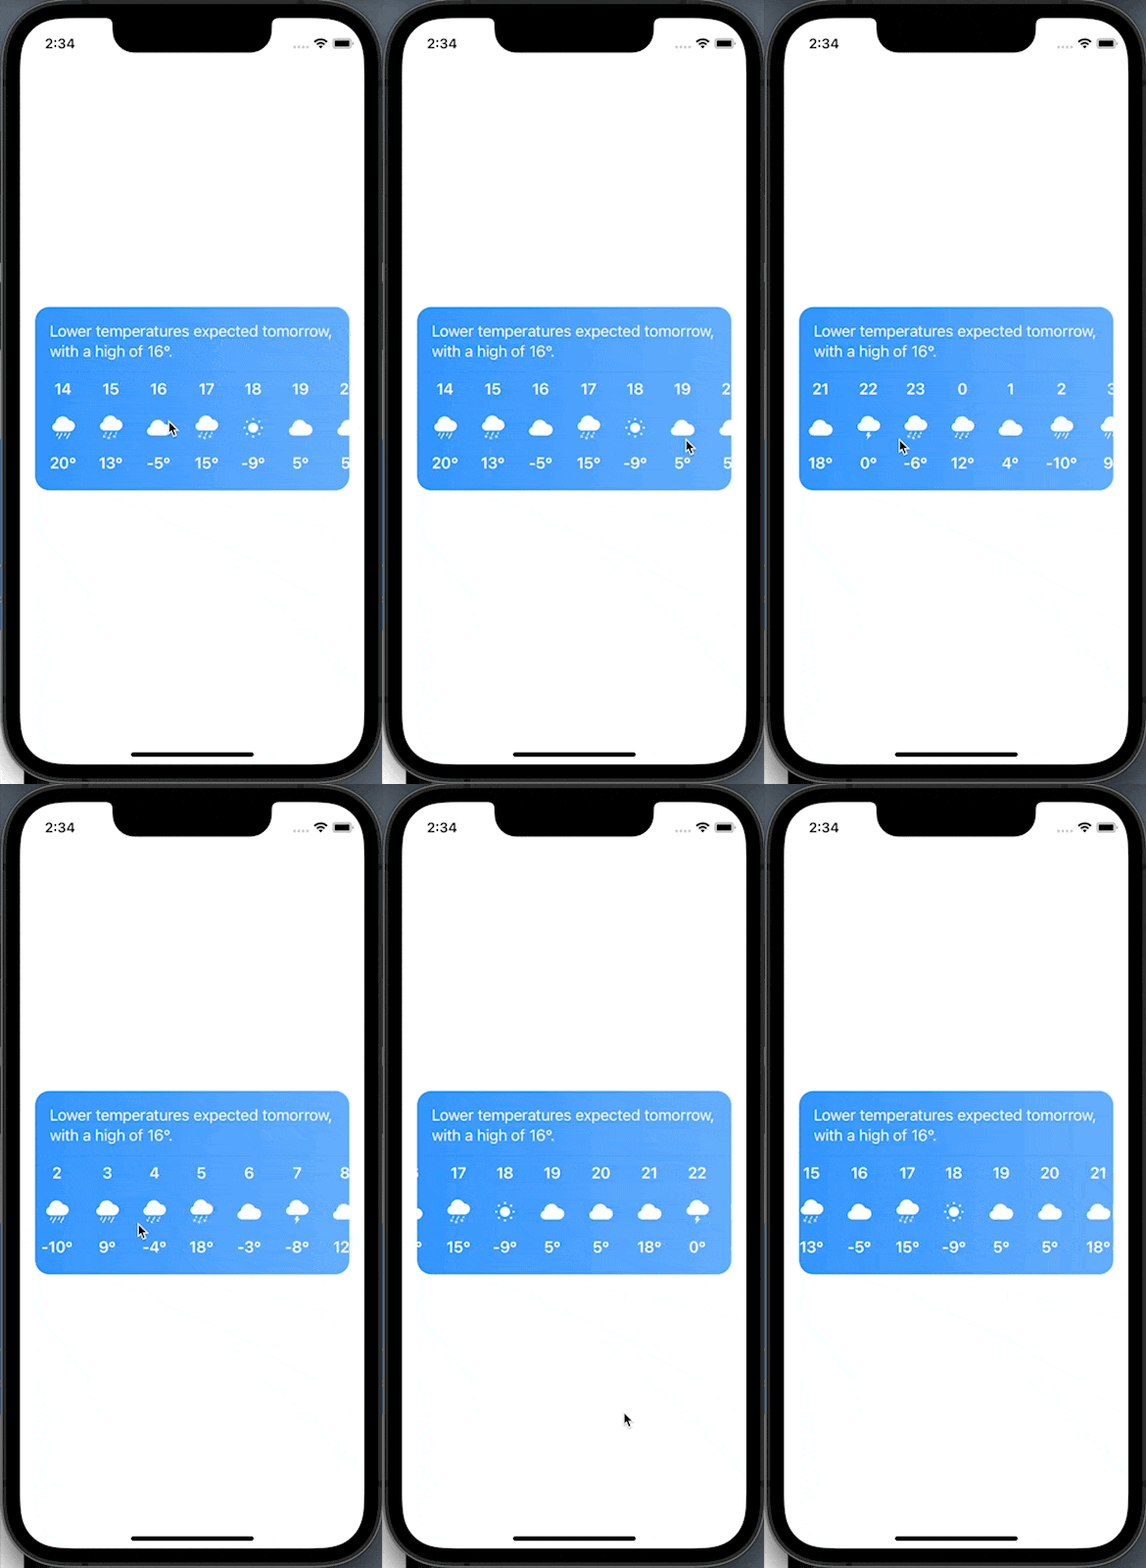
Let’s see it in action.

Although, not exactly like the official Apple weather app hourly forecast component, it’s a start!
Now hopefully, you have a better idea of how to create a similar component for your app.
The full source code is available here.
Happy coding!